Teams
Set up and manage a Stoa team — invite members, assign roles, configure permissions, and share spaces across your organization.
Teams are how you collaborate with others in Stoa. When you share a project with a team, every member can see it, join sessions, and work together. Each team gets its own dashboard, Spaces, settings, and billing.
You can create a team during signup or join an already existing team. If you create a team, you're the owner with full control.
The Team Home
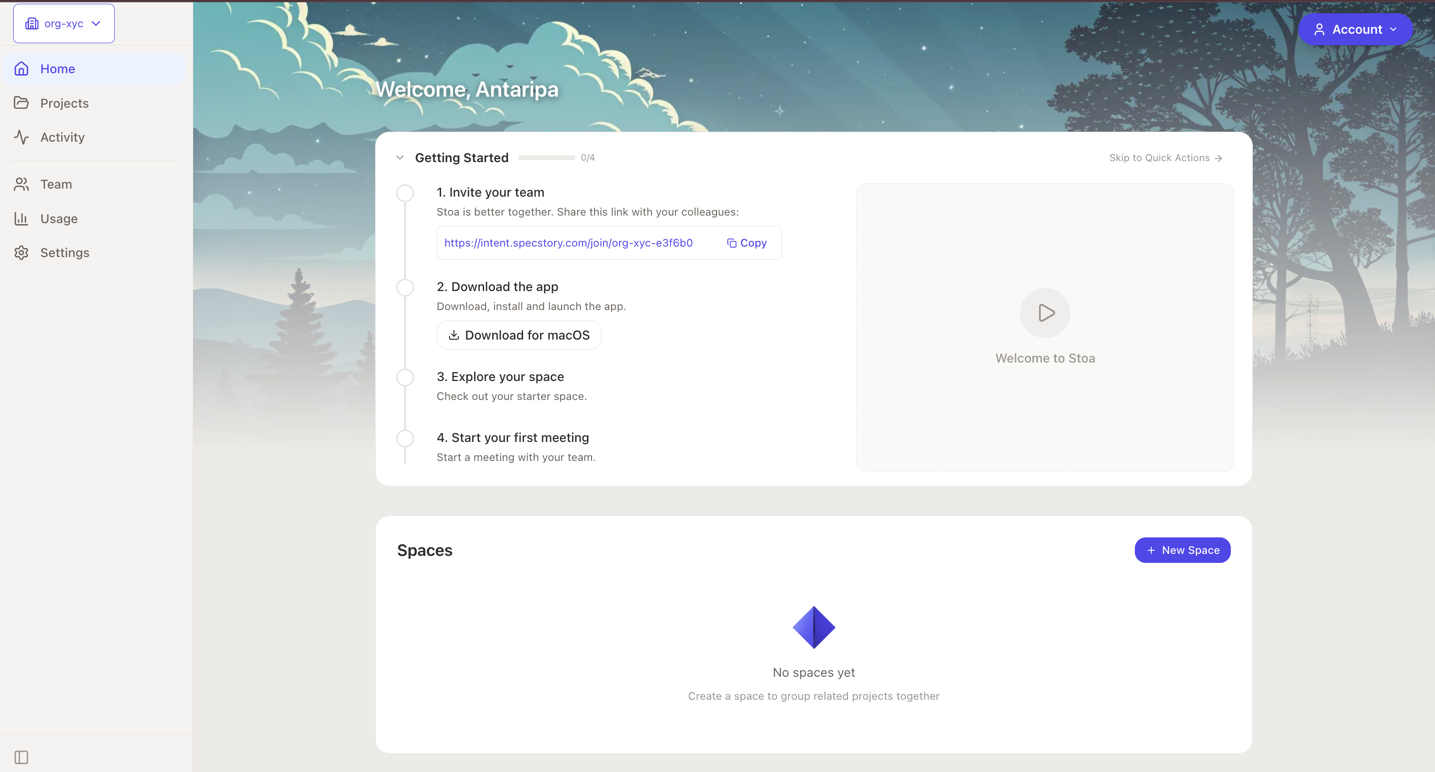
After creating a team (or completing the Welcome flow), you land on the team home page.
Getting Started Checklist
New teams see a Getting Started checklist at the top of the page. It walks you through initial setup with steps like inviting teammates, downloading the desktop app, exploring a Space, and starting your first meeting.
Each step has an action button or link. Some steps complete automatically when the underlying condition is met (for example, inviting a team member completes once the team has more than one member). A progress bar shows how far along you are.
The checklist steps are configured by the Stoa team and may change over time. You can collapse the checklist if you want to get to the dashboard content below.
Quick Actions Hub
Once you complete the Getting Started checklist (or click "Skip to Quick Actions"), it is replaced by a Quick Actions hub. This gives you one-click access to common tasks:
- Start Meeting: pick a Space and jump straight into a session
- + Space: create a new Space
- + Project: create a new project
- Invite: go to the Members & Access settings to manage invites
- Activity: go to the activity feed
- Settings: team configuration
- Billing: billing and usage (admin/owner only, when billing is enabled)
Stats Cards
Collapsible summary cards below the checklist/Quick Actions:
- Total Credits: combined balance across all members
- Total Usage: all-time spend
- Members: count with breakdown by role (owner, admin, member)
Spaces Section
Lists all Spaces in the team with:
- Space name and description
- Number of projects
- Active live sessions with "Join" buttons
- Edit and Open actions
Shared Projects Section
Lists all projects shared with the team:
- Project name and owner
- File count
- Which Spaces the project belongs to
- Active sessions with Join buttons
- Collapsible past sessions with extracted topics
Inviting Members
- Navigate to your team's Settings page and open the Members & Access tab.
- Click Create Invite.
- Configure the invite:
| Option | Description |
|---|---|
| Role | Member (all members can create), or Admin (owner only can create admin invites) |
| Expires in | Optional number of days until the link expires |
| Max uses | Optional limit on how many times the link can be used |
- Copy the generated link and share it with your teammates.
You can view active invites with usage stats and revoke invites from the same page.
Note
Regular members can now create invite links, but only for the Member role. Owners can create invites for both Admin and Member roles.
Roles and Permissions
| Capability | Owner | Admin | Member |
|---|---|---|---|
| Access shared projects and Spaces | Yes | Yes | Yes |
| Join sessions and calls | Yes | Yes | Yes |
| Start/stop AI agent | Yes | Yes | Yes |
| Create Spaces and projects | Yes | Yes | Yes |
| Manage members | Yes | Yes | No |
| Create invite links (Member role) | Yes | Yes | Yes |
| Create invite links (Admin role) | Yes | No | No |
| View billing and usage | Yes | Yes | No |
| Manage team settings | Yes | Yes | No |
| Change member roles | Yes | Yes* | No |
| Manage API keys | Yes | Yes | No |
| Delete the team | Yes | Yes | No |
*Admins cannot modify owners or their own role.
Managing Members
The Members & Access tab in Settings shows all members in a list with:
- Name, email, and role badge (color-coded: owner, admin, member)
- Role selector dropdown for changing roles (admin/owner only, cannot modify owners or yourself)
- Remove button with confirmation dialog
- Your own entry shows a (You) indicator
Team Settings
The Settings page is organized into tabs:
General Tab (Admin/Owner)
Team Identity:
- Logo: upload a team logo (PNG, JPEG, or WebP, max 512 KB). Drag and drop or click to upload.
- Name: edit your team's display name inline
- Timezone: set the team's default timezone
API Key:
- View your team's masked Anthropic API key
- Copy the key for CLI configuration
- See when the key was last updated
- CLI usage:
stoa configure llm --from-org(requires LLM build)
Danger Zone (Admin/Owner):
- Delete team permanently removes the team and all associated data
- Shows warnings about remaining balance and member count
- Requires explicit confirmation
- This action cannot be undone
Members & Access Tab (All Members)
See Inviting Members and Managing Members above.
Billing Tab (Admin/Owner)
See Billing for details.
Audit Log Tab (Admin/Owner)
View a log of team actions for accountability and compliance.